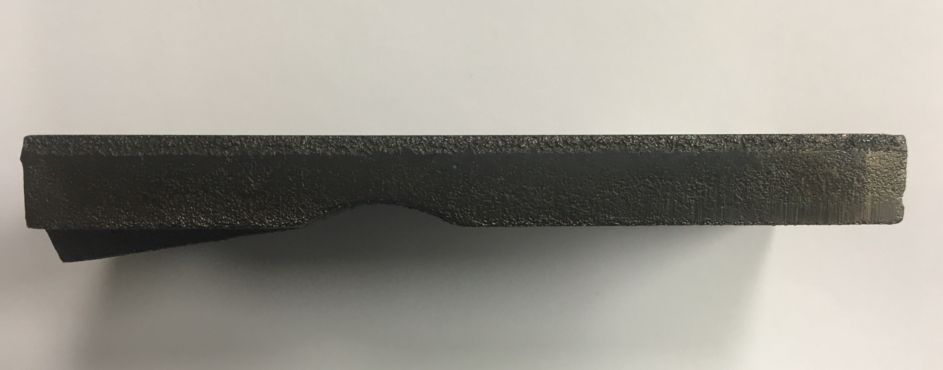
Routine inspections of your blastwheel assembly is key in preventing costly down time and keeps your Guyson Wheel Blast System operating as it should. Included in each blastwheel assembly, are a total of six (6) blastwheel blades that act as “paddles” and are what project the media at the work surface of the part. As the blastwheel is rotating at a high velocity, the blades experience the most wear due to the high contact with media.
Regular inspections are necessary to maintain sound blade integrity, proper media flow for blast coverage and impact on components being processed. Any worn or damaged blades should be replaced immediately. It is also extremely important that all six (6) blades are replaced at the same time in order to maintain correct balance of the blastwheel.
The blastwheel blades are locked into place by the blastwheel cam rollers. Confirm each of the cam rollers are in good condition prior to installing the new blades.
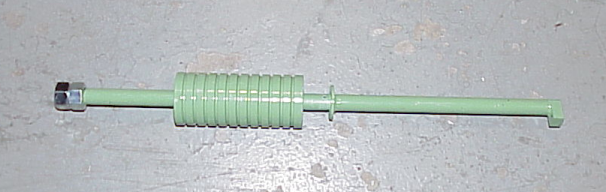
- Each wheel blast machine is equipped with a blade removing tool shown below
 Remove cover of the blastwheel housing and blastwheel armor.
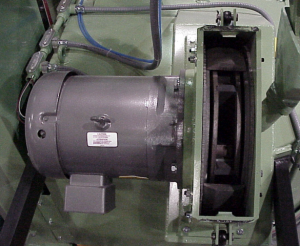
- Remove any remaining silicone from new blade installation.
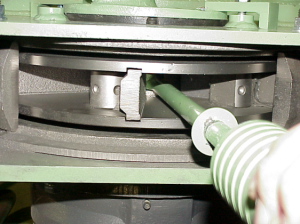
- Insert blade removal tool into blastwheel. Pull up on the worn blade that is to be replaced until blade is released. This may take several tries and require use of the slide hammer portion of the blade removal tool. The cam should rotate as the blade is being released but may require manual rotation. Repeat until all six (6) blades are removed.
- With all six (6) blades removed, clean and remove any silicone or debris and Inspect cam rollers for damage or wear. Cam rollers should rotate freely once silicone is removed if used on previous blade installation (silicone may be used on new wheel & new blade installations). If any cams found to be worn or damaged, replace the blastwheel immediately.
- Start by positioning the cam roller so that the flat side is facing where the blastwheel blade is to be installed.
- Insert the new blade while at the same time rotating the cam roller until the round portion of the cam roller seats against the rounded area on the back side of the blade . The top portion of the blade should be flush with the blastwheel in order to prevent the blade from rubbing on the regulator


- Once blades are installed correctly, manually rotate the blastwheel and confirm the blades do not rub against the regulator and the blastwheel rotates freely.
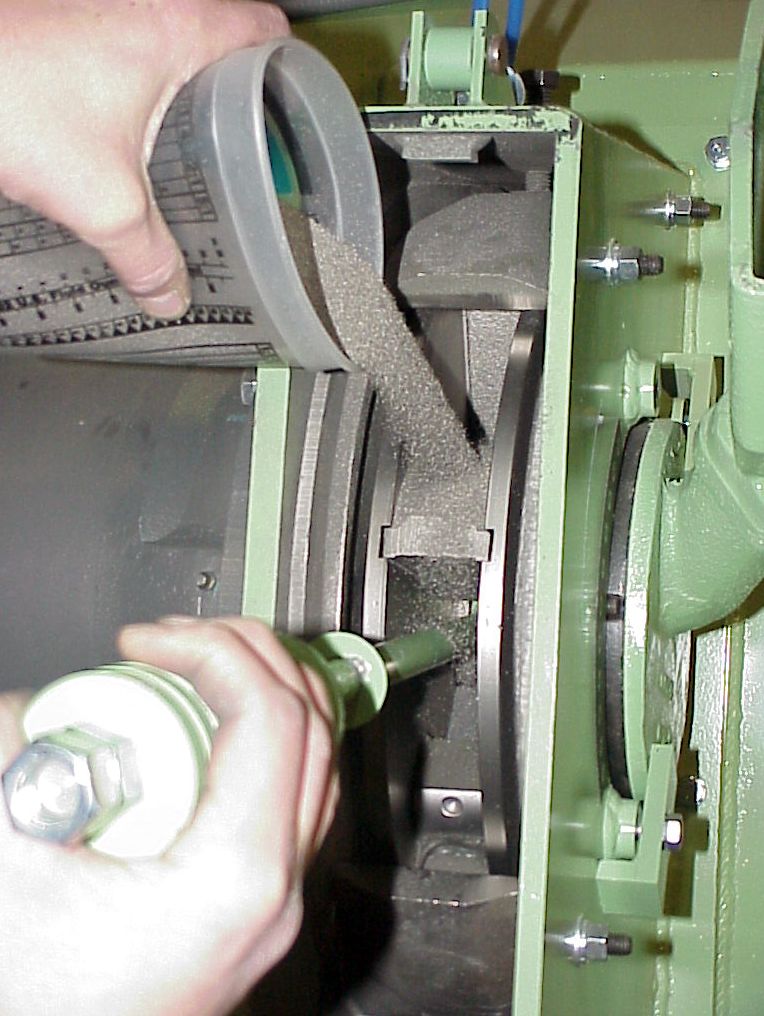
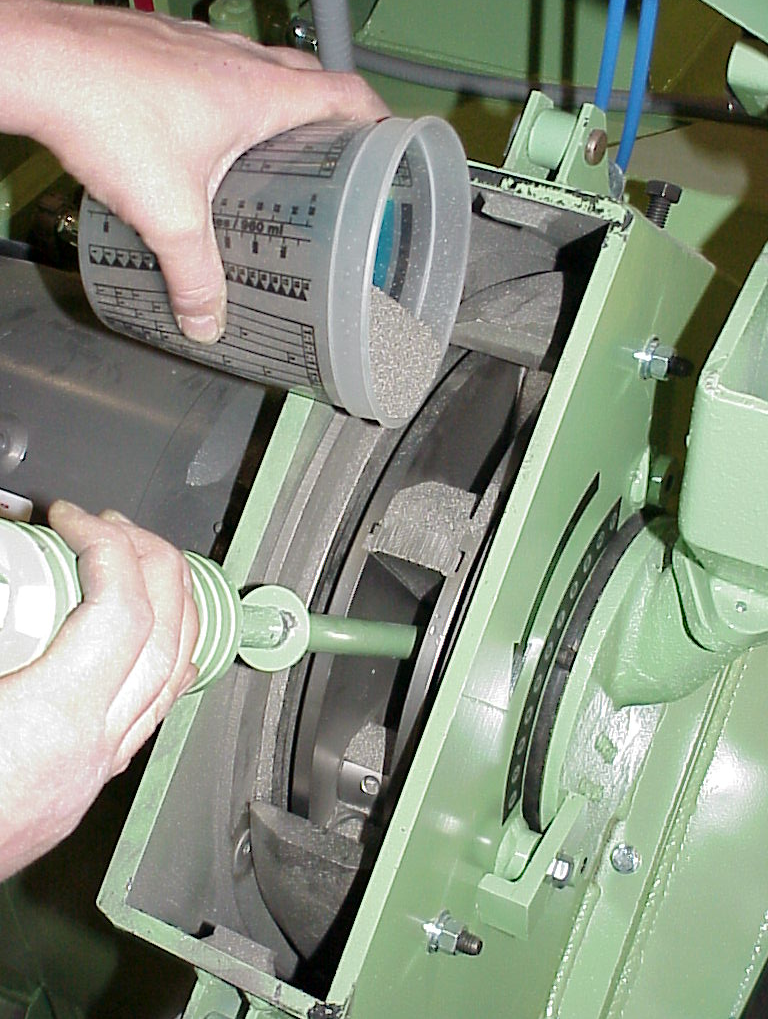
- Further lock the cam rollers and blades into place by using blast media to fill in any gaps between the cam roller, blade and blastwheel.
- Insert blade removal tool into blastwheel. Pull up on the newly replaced blade so that it is pushing against the cam/locking roller.
- Slowly begin to add media into the blastwheel as shown below at the same time moving the blade slightly allowing media to fill in any gaps.


- Repeat until you have added media to each blade of the blast wheel.
- Once again, after installation is complete, manually turn the blastwheel to ensure blades do not rub against the regulator. If rubbing occurs, repeat procedure.
- Reinstall blastwheel armor and top blastwheel housing cover.
**Silicone can be used in place of media to further secure the blastwheel blades when installing new blades into a new blastwheel before both are installed in the system. Silicone must be fully cured before the blastwheel is installed into the machine/prior to use (approx. 24 hours).
Contact Guyson Customer Service for additional information on using the silicone method.
Need replacement parts , click the button below to request a quote .
New!